In this article:
- Introduction to Workspaces
- Workspace Settings
- Adding Team Members
- Groups
- Sharing a Single Company with a User (Shared with Me Folder)
- Manage Clients
- Billing and Subscription
Introduction to Workspaces
Workspace Owners can manage the billing, add new users to the workspace, assign secondary admin access, manage consolidation settings, change a user to a client or a client to a user, and transfer workspace ownership to a different user.
Secondary Admins can do everything the workspace owner can, except manage billing or remove the workspace owner.
You can add secondary admin permissions by clicking the gear next to the user's name and selecting "Make Secondary Admin".
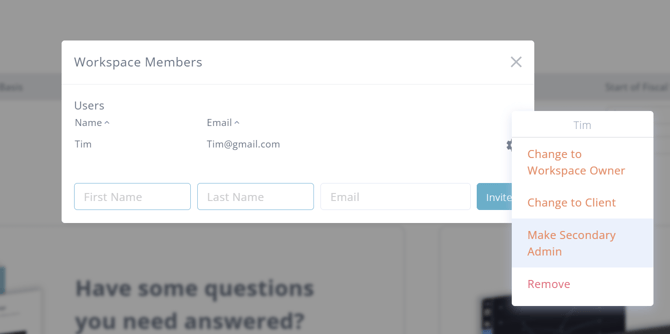
Users have the same permissions as the workspace owner, but cannot see billing settings, manage consolidation settings, change a user to a client or a client to a user, transfer workspace ownership, or add new users to the workspace.
Clients can only see what is shared in the client portal. They will have no edit abilities, except for budgets/forecasts (if uploaded to the client portal with edit access).
The purpose of a Workspace is to allow you to have a clearer and easier understanding of which firm you are working in.
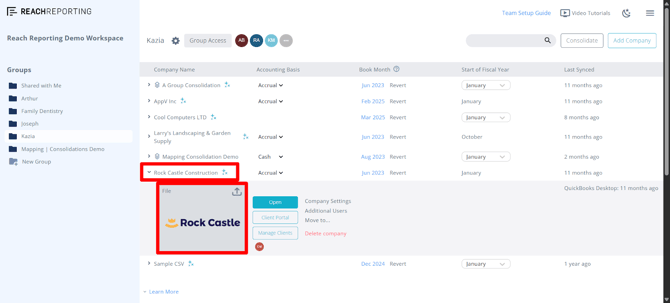
Once in your Workspace, you will see an enhanced user experience that allows for easier management of your clients. You can upload logos for each client right away by clicking on the client's name.
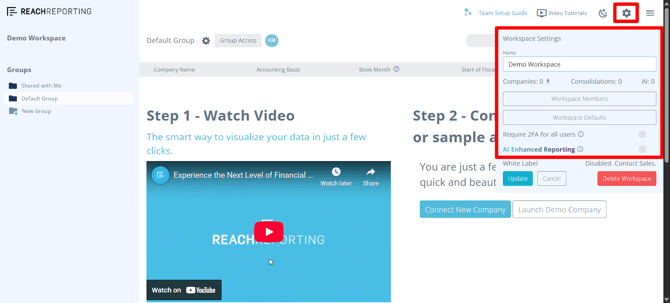
Set up your Workspace by clicking the gear icon in the upper right corner of the Workspace. This is only viewable by the Workspace Owner.
Workspace Settings
Within the Workspace Settings the Workspace Owner can:
- Set the workspace name
- Download a list of companies connected
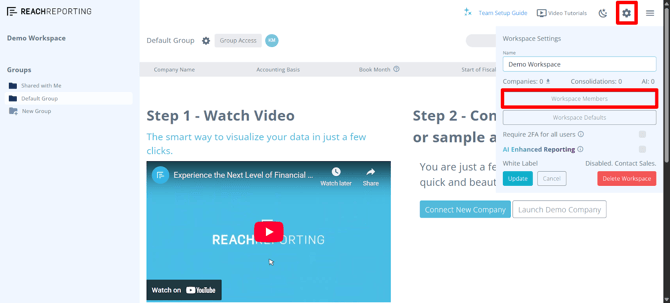
- Add workspace members
- Set the workspace’s default logo and theme
- Require Two-Factor Authentication (2FA) for all users and clients
- Enable the AI Enhanced Reporting feature
- Delete the workspace
Adding Team Members
The Workspace Owner must add all Team Members that you want to have access to a group of companies or a single company. The Workspace Owner must first click the gear icon and add all Team Members, and then they can give access to the Groups.
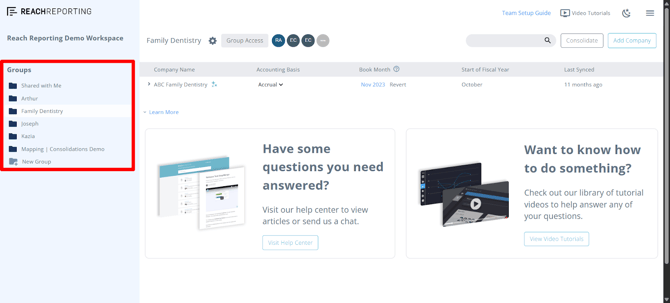
Groups
Groups are where you add team members assigned to manage a specific group of clients. Groups allow you to segment the companies at your firm the way you want.
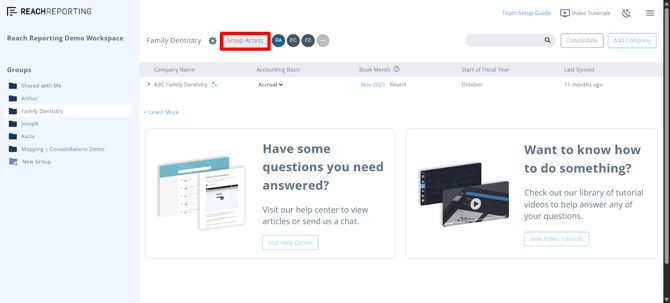
To add a Team Member to a group, click the Group Access button on any folder. These team members can then add companies to the group to which they have access.
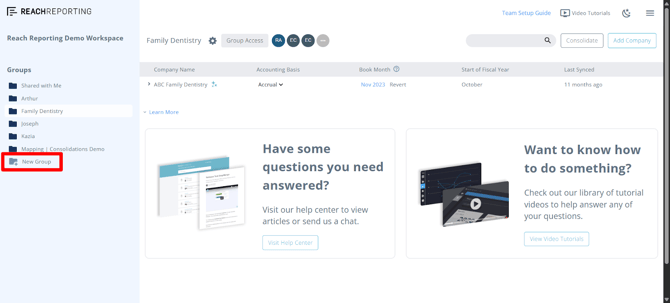
Creating a New Group
Under your current group list, click on "New Group" and start typing. Hit "Enter" or "Return" on your keyboard when done, and this will create the group.
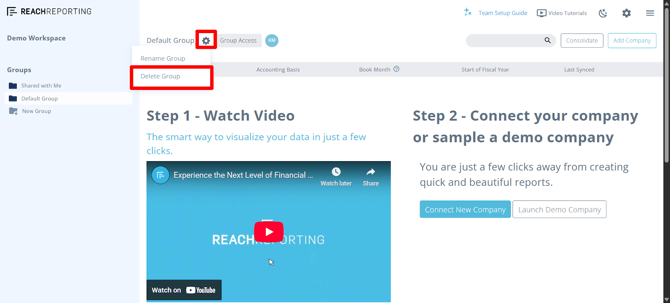
Deleting/Renaming a Group
In order to delete a group, click on the gear icon once all companies have been removed from that group. You cannot delete the "Shared with me" group.
Sharing a Single Company with a User (Shared with Me Folder)
To add a team member to a single company, click the company name to expand it, then click Additional Users to add them. This will show up in their Shared with Me folder. The Shared with Me folder is only used when an individual company has been shared directly with a user.

Note: Users whose access to a company comes through the Shared with Me folder have some limitations while working from that folder. They will not be able to:
- Add new companies to the workspace
- Create consolidations
- Access other users in the workspace (they can only view the additional users who have access to that specific shared company)
- Move the company to a different group
If a user needs these capabilities, team members should be added to the Group that contains that company instead.
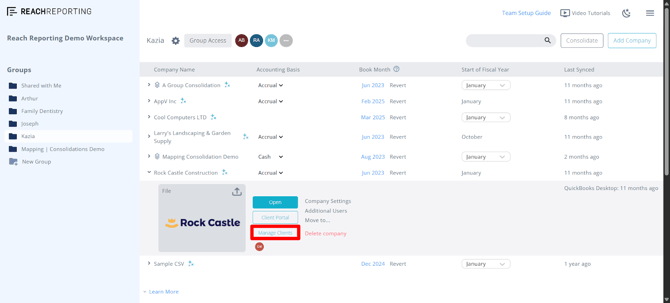
Manage Clients
Team Members can add and manage client connections. They can also add additional Users and add Clients to the Client Portal.
Note: Clients are added separately to each company to give them access to the client portal. Check out this Knowledge Center article for more on the Client Portal.
Once the workspace owner adds all of the team members, then each team member will only be able to view the groups and individual companies they have access to.
All Team Members can:
- Create New Groups/Folders
- Connect/Manage companies
- Allow other team members who have already been added by the Workspace Owner to access a group or a single company

Billing and Subscription
Billing is still tied to the Owner of the Workspace. Only they can see the Workspace Settings.
To access the billing, the Workspace Owner can click the 3 stacked lines in the top right corner of the workspace and then click the “Billing/Plan” setting. They will be able to update billing information and download invoices.
Check out these Knowledge Center articles for more on Understanding Your Monthly and Annual Billing Cycles and Managing Your Billing and Plan.
Go to the Reach Reporting app>
ARE YOU NOT CURRENTLY USING REACH REPORTING?
learn more at reachreporting.com
We are dedicated to helping you.
- Need Additional Help?
Your success is important to us.
Whether you're working as a CFO of a business or part of an accounting firm, Reach Reporting is here to improve your working knowledge of reporting and provide service tips and skills to ensure you're at the top of your game.
We make sure that you have access to staff members who are best suited to help you. We work together to resolve issues and create memorable moments that empower you to enhance your reporting skills.
We are here to listen to you. We understand that using new technology can be frustrating, so we can answer questions or jump on a quick Zoom call. Our entire staff has an in-depth knowledge of Reach Reporting and can quickly direct you to best practices to improve your reporting.
We are focused on providing solutions that save you time and increase your value. We continue to improve each day and look forward to visiting with you. Your communication with us is vital and appreciated.
Please feel free to chat with us by clicking the help chat bubble in the lower right-hand corner of this page.
Reach out to your Reach Reporting Rep and schedule a Zoom meeting by clicking the meeting link in their email signature.
Or schedule to join our ongoing webinars.
Reach Reporting is dedicated to helping provide a knowledge base that is easy to understand and informative. If you still have questions that have not been answered, please let us know by emailing support@reachreporting.com, chatting with our support team, or calling us at (877) 467-7637. We are here to ensure that you have a positive experience with Reach Reporting, as we want to continue to be the reporting solution you trust.
Need more access to Reach Reporting Resources?
Reach Reporting has a wealth of knowledge and a robust online community to support you as you create reports that provide powerful insight. Please look into the following resources.
Reach Reporting Blog: We add blogs to our site every month to give you great information in a fun and friendly manner.
Case Studies: We interview one company per month to help our clients highlight how they are using Reach Reporting and how it is improving their services and firm offerings. These case studies are invaluable to our community.
Knowledge Center: From simple to complicated, we provide step-by-step guidance to utilize every aspect of Reach Reporting in our robust knowledge center.
Video Tutorials: We know watching is sometimes easier than reading, which is why all of our tutorials are video-based in the video tutorial section of Reach Reporting and Youtube.
Social Networks: Join us on FaceBook, LinkedIn, Youtube, and Twitter.
Monthly Newsletter: Go to the footer of reachreporting.com and sign up to receive the Reach Reporting newsletters delivered directly to your inbox. Our newsletters cover tips and tricks, current events in accounting, strategies to improve your advisory services, and much more.
We look forward to helping you build insightful reports,
The Reach Reporting Team.